This scenario is supported for all retention label configurations, including regulatory records.
Use the following information to help you publish retention labels, and then apply them to documents and emails.
Retention labels help you retain what you need and delete what you don't at the item level (document or email). They're also used to declare an item as a record as part of a records management solution for your Microsoft 365 data.
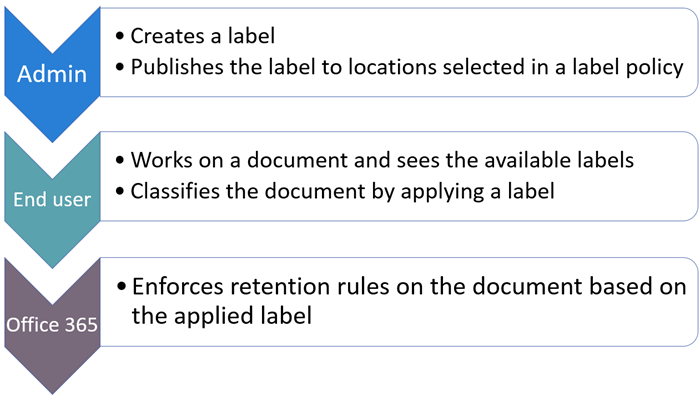
Making retention labels available to people in your organization so that they can classify content is a two-step process:
Use the following instructions for the two admin steps.
If you're not an E5 customer, use the 90-day Microsoft Purview solutions trial to explore how additional Purview capabilities can help your organization manage data security and compliance needs. Start now at the Microsoft Purview compliance portal trials hub. Learn details about signing up and trial terms.
To make sure you have permissions to create and edit retention labels and their policies, see the permissions information for records management or data lifecycle management, depending on the solution you're using.
Make sure you have created the retention labels you want to apply to items.
Decide before you create your retention label policy whether it will be adaptive or static. For more information, see Adaptive or static policy scopes for retention. If you decide to use an adaptive policy, you must create one or more adaptive scopes before you create your retention label policy, and then select them during the create retention label policy process. For instructions, see Configuration information for adaptive scopes.
For this configuration, you can use either the Microsoft Purview portal or the Microsoft Purview compliance portal.
For information about the location choices, see Locations.
To edit an existing retention label policy (the policy type is Publish), select it, and then select the Edit option to start the Edit retention policy configuration.
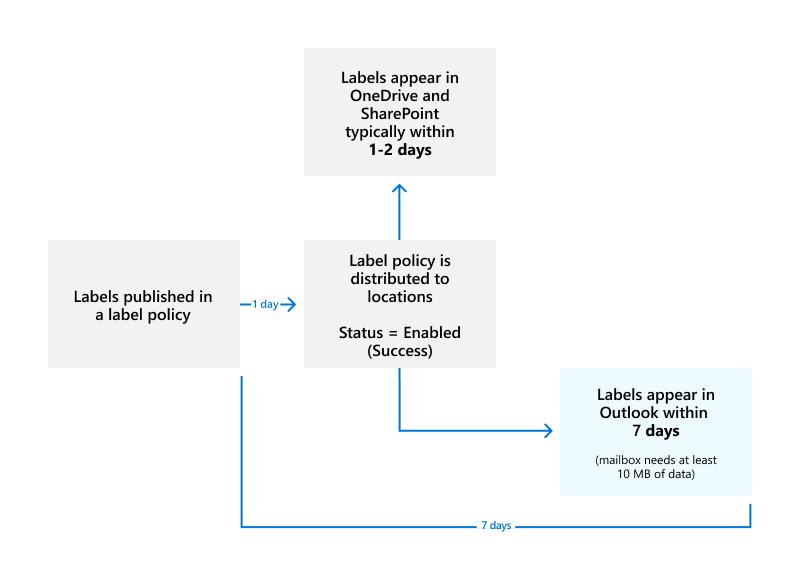
If you publish retention labels to SharePoint or OneDrive, those labels typically appear for users to select within one day. However, allow up to seven days.
If you publish retention labels to Exchange, it can take up to seven days for those retention labels to appear for users. As with all retention settings for Exchange, the mailbox must contain at least 10 MB of data.
If the labels don't appear after seven days, check the Status of the label policy by selecting it from the Label policies page in the Microsoft Purview portal or the Microsoft Purview compliance portal. If you see (Error) included in the status and in the details for the locations see a message that it's taking longer than expected to deploy the policy or to try redeploying the policy, try running the Set-AppRetentionCompliancePolicy or Set-RetentionCompliancePolicy PowerShell command to retry the policy distribution:
Set-AppRetentionCompliancePolicy -Identity -RetryDistribution Set-RetentionCompliancePolicy -Identity -RetryDistribution In Exchange Online, retention labels are made available to end users by a process that runs every seven days. By using PowerShell, you can see when this process last ran and therefore identify when it will run again.
$logProps = Export-MailboxDiagnosticLogs -ExtendedProperties $xmlprops = [xml]($logProps.MailboxLog) $xmlprops.Properties.MailboxTable.Property | ?
In the results, the ELCLastSuccessTimeStamp (UTC) property shows when the system last processed your mailbox. If it hasn't happened since the time you created the policy, the labels aren't going to appear. To force processing, run Start-ManagedFolderAssistant -Identity .
If labels aren't appearing in Outlook on the web and you think they should be, make sure to clear the cache in your browser (CTRL+F5).
Use the following sections to learn how published retention labels can be applied in apps:
In addition, when you use Microsoft Syntex and publish retention labels to SharePoint locations, you can apply a retention label to a model so that identified files are automatically labeled.
After content is labeled, see the following information to understand when the applied label can be removed or changed: Only one retention label at a time.
Users can manually apply retention labels from the following locations:
Use the following tabs to understand how to manually apply retention labels for each location:
Your published retention labels display in Outlook alongside any legacy MRM retention tags that are assigned to the mailbox. Although you see references to retention policies, users can't select your Microsoft 365 retention policies in the Outlook apps.
To label an item in the Outlook desktop client, select the item. On the Home tab on the ribbon, select Assign Policy, and then choose the retention label. For example:
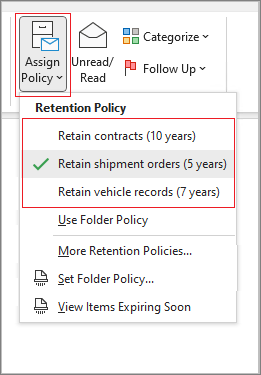
If you don't immediately see the option to assign policy, look for the Tags group on the ribbon.
You can also right-click an item from a folder, such as the Inbox folder for emails received or the Drafts folder for an email to be sent. Then, select Assign Policy in the context menu, and then choose the retention label. When you select multiple items, you can use this method to apply the same retention label to multiple items at once.
To label an item in Outlook on the web, first right-click the item from a folder. Then, select Advanced actions > Assign policy, and then choose the retention label. For example:
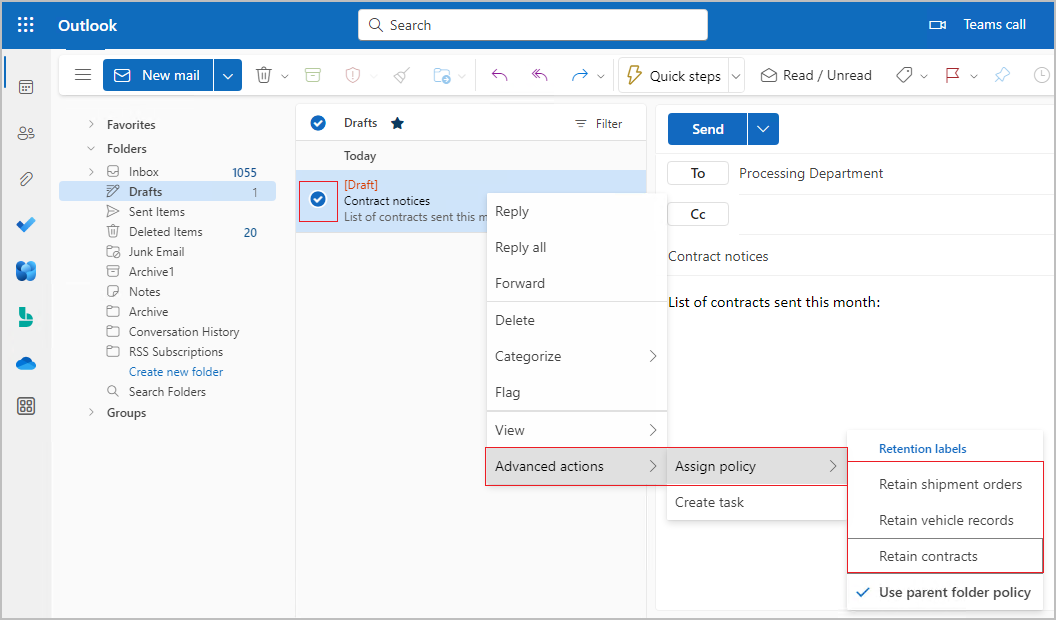
As with Outlook desktop, you can also use this labeling method if you multi-select items.
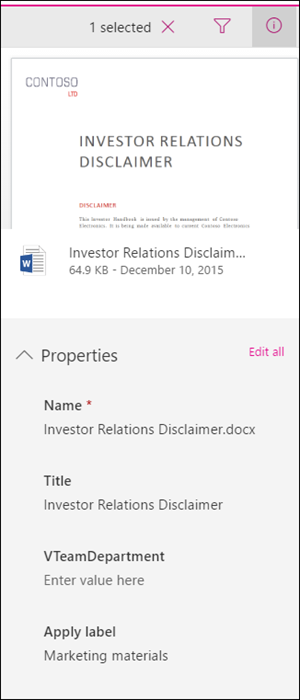
After the retention label is applied, you can view that retention label at the top of the item, and the calculated expired date. For example:

For more information about the expiry date displayed to users, see User notification of expiry date.
Manually applying retention labels is supported in the new experience only, and not the classic experience.
To label a document (including OneNote files) in OneDrive or SharePoint, first select the item. Then in the upper-right corner, open the details pane, and choose the retention label from Apply label.
You can also apply a retention label to a list item, folder, or document set, and you can set a default retention label for a document library.
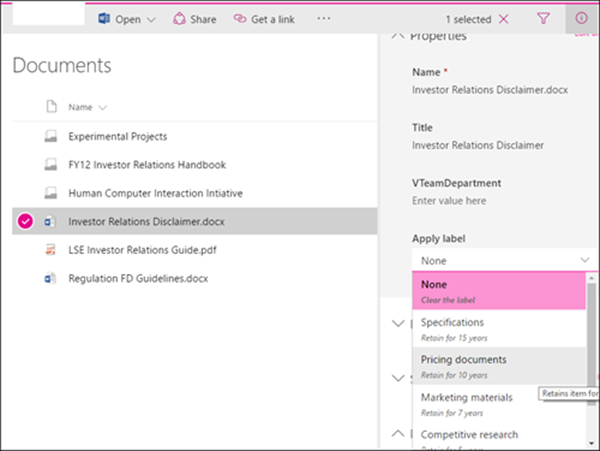
After a retention label is applied to an item, you can view it in the details pane when that item's selected.
For SharePoint, but not OneDrive, you can create a view of the library that contains the Labels column or Item is a Record column. This view lets you see at a glance the retention labels assigned to all items and which items are records. Note, however, that you can't filter the view by the Item is a Record column. For instructions how to add columns, see Show or hide columns in a list or library.
When you publish retention labels to the Microsoft 365 Groups location, the retention labels appear in the SharePoint teams site but aren't supported by any email client for group mailboxes. The experience of applying a retention label in the site is identical to that for documents in SharePoint.
Users can also apply the retention labels directly in Teams, from the Files tab:
After a retention label is published to SharePoint and Outlook, users can apply it as a default retention label so that it's inherited by all unlabeled items. Although the same label is applied, each item will be retained and deleted separately, according to the start of the retention period setting in the label.
When you use default retention labels, there are some scenarios that can result in the inherited label being replaced or removed. See each tab for details about the label behavior.
You can apply a default retention label to all content in a SharePoint library, folder, or document set. Documents in that location then inherit your selected default retention label.
For a document library, the default label configuration is done on the Library settings page for a document library. When you choose the default retention label, you can also choose to apply it to existing items in the library.
For example, if you have a retention label for marketing materials, and you know a specific document library contains only that type of content, you can make the Marketing Materials retention label the default label for all documents in that library.

For standard retention labels that you apply as a default retention label to a library, folder, or document set:
When labels are applied that aren't standard retention labels but mark items as records (or regulatory records), these labels can only be manually changed or removed.
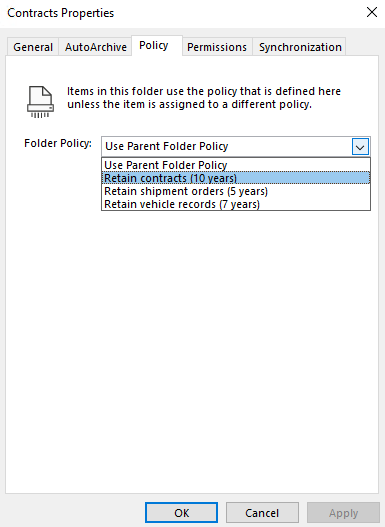
You can apply a default retention label to Outlook folders so that the label is inherited by all unlabeled items.
In the Outlook desktop client, right-click the folder, select Properties, the Policy tab, and then change Use parent folder policy to the retention label you want to use as that folder's default retention label. For example:
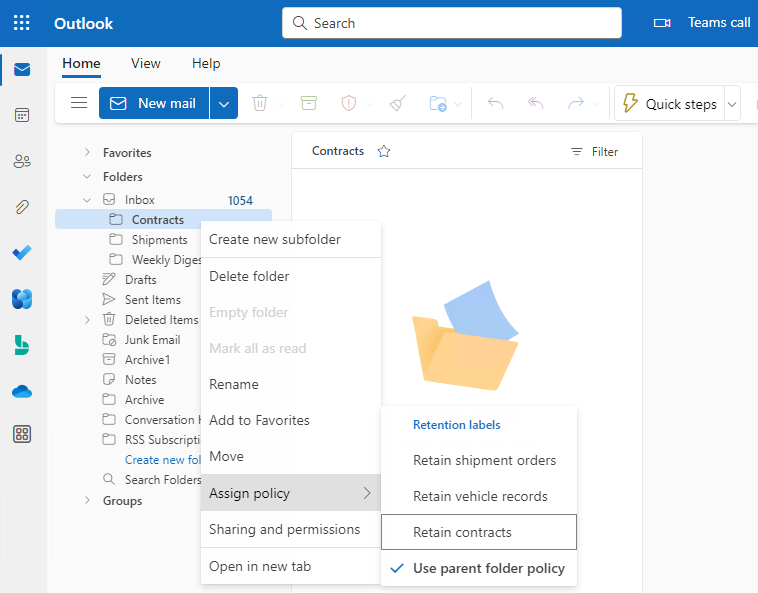
In Outlook on the web, right-click the folder, select Assign policy, and change Use parent folder policy to the retention label you want to use as that folder's default retention label. For example:
When you use a standard retention label as your default label for an Outlook folder:
When labels are applied that aren't standard retention labels but mark items as records (or regulatory records), these labels can only be manually changed or removed.
In Outlook, you can create rules to apply a retention label. For example, you can create a rule that applies a specific retention label to all messages sent to or from a specific distribution group.
To create a rule, right-click an item, select Rules > Create Rule > Advanced Options > Rules Wizard. Specify the condition or conditions for the first step, and then apply retention policy for the action:
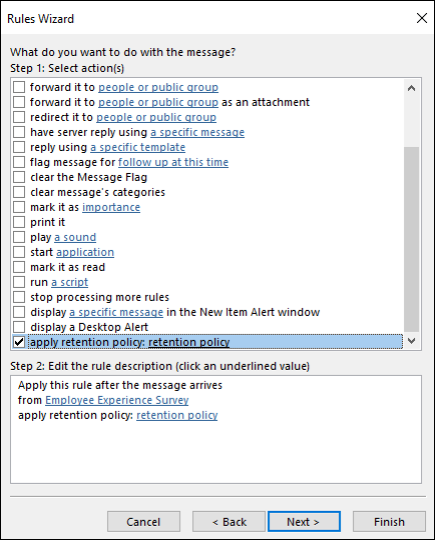
Although you see a reference to retention policies, retention labels are displayed and can be selected.
If you edit a retention label or a retention label policy, and the retention label or policy is already applied to content, your updated settings will automatically be applied to this content in addition to content that's newly identified.
Some settings can't be changed after the label or policy is created and saved, which include:
To delete a retention label, all three conditions must apply:
When all these conditions are met:
If you need to ensure that no one can turn off the policy, delete the policy, or make it less restrictive, see Use Preservation Lock to restrict changes to retention policies and retention label policies.
If your retention label policies aren't working as expected or you see errors related to these policies, use the following troubleshooting resources:
To help you track the labels applied from your published retention labeling policies:
Event-based retention is another supported scenario for retention labels. For more information, see Start retention when an event occurs.